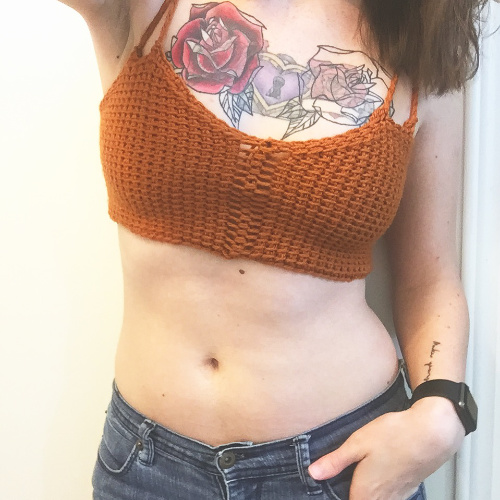
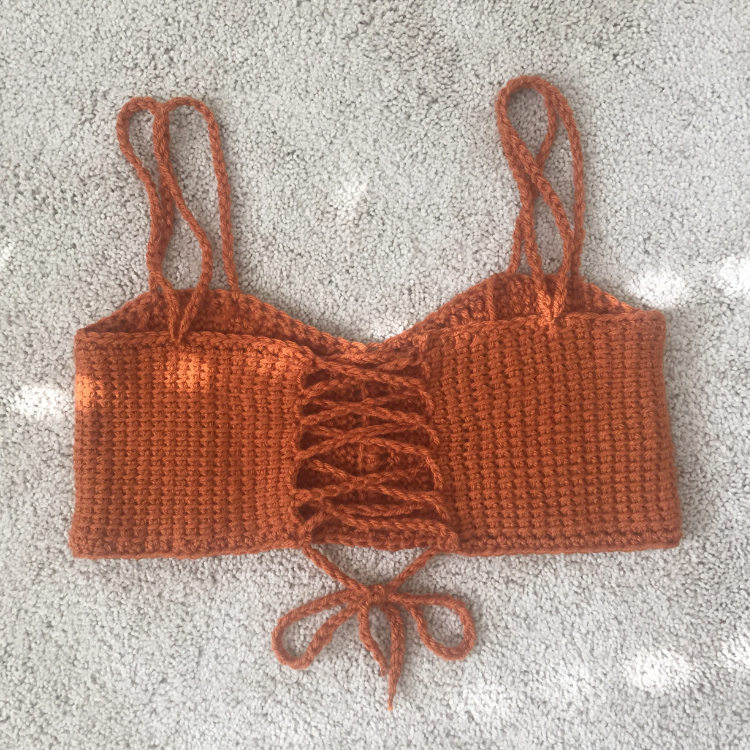
The Solstice Crop Top (Tunisian Crochet Pattern)
Hey Makers, happy summer!
Yes, it is officially summer here in the northern hemisphere of our little life sustaining planet Earth. This day is commonly referred to as the Summer Solstice. What’s a solstice? Well, here’s what Wikipedia has to say about that:
“The summer solstice (or estival solstice), also known as midsummer, occurs when a planet’s rotational axis, or geographic pole on either its northern or its southern hemisphere, is most inclined toward the star that it orbits.”
– Wikipedia on “Summer Solstice“
What this all means is that today is when the sun reaches its highest altitude in the sky for the year. Today will have the longest period of daylight for the year 2017! What’s not to love about getting extra sunshine?
We’re not witnessing too much sunshine here in North Carolina today, but it’s still fun to celebrate the official onset of summer. My form of celebration this year is to offer you guys a fun new project that you’ll want to make and wear all summer long! Many super talented makers on Instagram (and Pinterest, and beyond) have been making all these adorable bralettes and crop tops, so I figured I would get in on the fun. I took a slightly different spin on the construction, but I think you’re going to love the challenge.
THIS IS NOT YOUR AVERAGE CROCHET PATTERN
All of the tops I’ve seen to date have been standard crochet with various construction techniques and styles. I thought that I would bring a new craft to the crop top game with Tunisian crochet! I think that this fiber craft is often overlooked because it’s so commonly used for blankets and scarves, and not much else. I thought that it would be fun to create something that utilizes the gorgeous stitches available in the world of Tunisian crochet in a modern and unique way.
If you’ve never done Tunisian crochet before, don’t fret! I promise it’s not that difficult. If you know some standard crochet basics and how it generally works, you’ll have no problem figuring out Tunisian style. You can also reference this page from Red Heart Yarns if you are unsure of any Tunisian crochet techniques or stitches.
WHAT YOU’LL NEED
Hooks: 6.5mm (US size K) Tunisian crochet hook, & 5mm (US size H) standard crochet hook
Yarn: ~200-400 yds / 180-360 m of worsted weight yarn
Suggested Yarns: Lion Brand 24/7 Cotton, Lily Sugar N’ Cream
Notions: Tapestry needle, scissors, stitch markers, ruler or measuring tape
Stitches Used: Chain, Tunisian Afghan Stitch, Tunisian Increase, Tunisian Decrease, Single Crochet, HDC
The standard crochet hook will be used for finishing touches on the crop top. The main construction of the top it done with the Tunisian hook.
DIRECTIONS
I originally planned to sell this as a properly sized pattern, but after running it by a few generous and talented testers, I decided that it would be better suited as a guided tutorial. I’ve included some suggested sizes you can follow if you’d like, or you can work with the general directions and customize your top to fit you more personally.
*Please note that I don’t have photos for this tutorial yet. I will be adding them within the next week or so to make this tutorial even better. In the meantime, feel free to post a comment at the bottom of the post if you have a question or need some help!
SIZE & FIT MODIFICATIONS
If you find that the sizes listed are not quite a perfect fit, you can modify the pattern in the following ways to help adjust it:
- To make the bralette longer, simply add more stitches to the foundation chain. Increase and decreases will be worked the same way.
- To make the cups wider/bigger, add more normal afghan stitch rows to the width between your increase and decrease rows.
- Your straps can be made to any length you like. If they are not thick enough, simply work the chain to your desired length, then turn and single crochet the length of the strap.
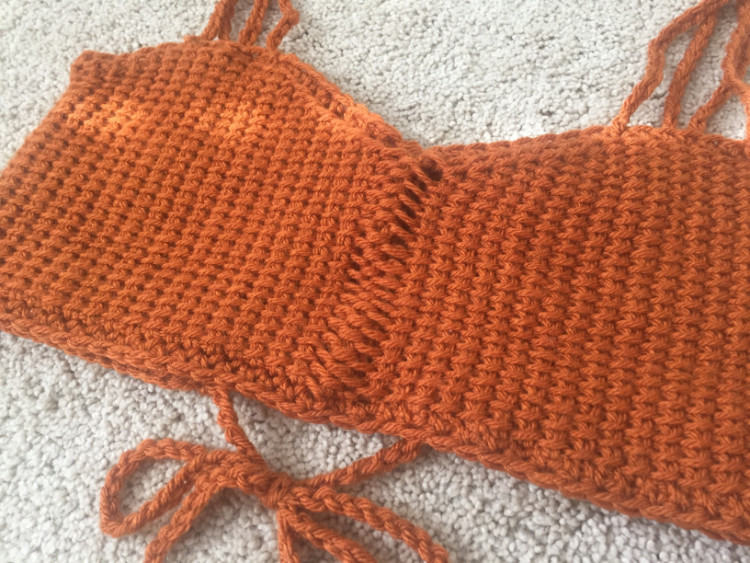
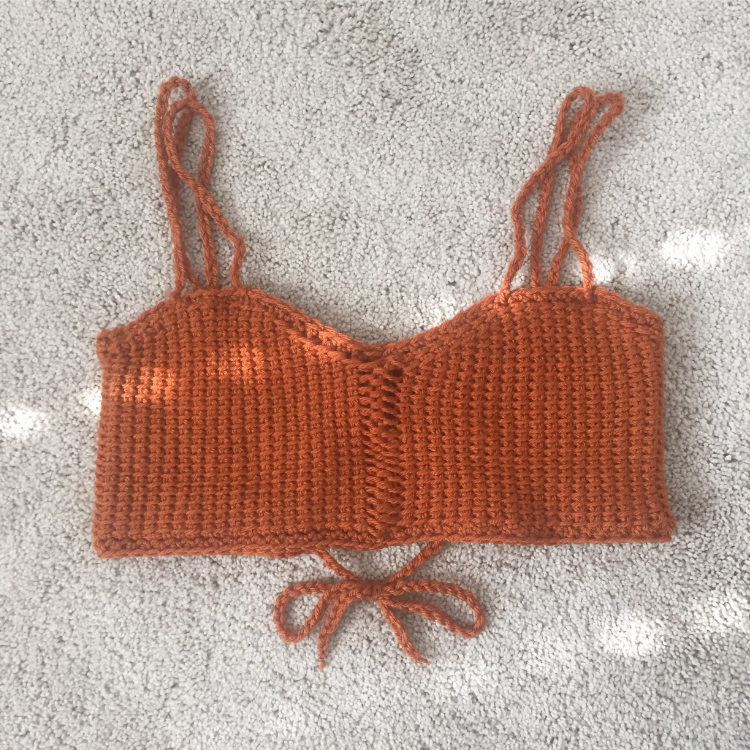
This top is worked in 2 separate Tunisian crochet pieces that are joined later with a single crochet seam in the middle of the front. The back is detailed with a corset style closure, and the double straps provide support and visual interest to the front of the top. We’ll start with the left half of the top, then make the right, seam them together, then finally work through the finishing touches.
LEFT HALF OF TOP
You will be working the left half of the top from the back seam to the front edge. Shaping of the bust will take place on the right side of your work, or the beginning of the row.
Chain 22 [27, 32]
Complete 18 [22, 30] rows of afghan stitch
Start increasing at the beginning of the next row. Increase by working the first stitch normally, then drawing an extra loop through the front loop of the top chain between 2 stitches.
Complete 4 [7, 10] increase rows
Place a stitch marker at the beginning of the final increase row (for attaching the strap later).
Work the next row as normal afghan stitch, no increase
Continue with 7 [10, 13] rows of normal afghan stitch
Start decreasing at the beginning of the next row. Decrease by working the first stitch of the row normally, then crochet the next 2 stitches together.
Place a stitch marker at the beginning of the first decrease row.
Complete 6 [9, 12] decrease rows
Bind off.
RIGHT HALF OF TOP
The right half of the top is going to be worked in the same direction as the left – back edge to front – but you will be increasing and decreasing on the opposite end of your rows. So your increases/decreases will be on the left side of your work, or the end of the row.
Chain 22 [27, 32]
Complete 18 [22, 30] rows of afghan stitch
Start increasing at the end of the next row. Increase by working the row normally until right before the next to last stitch of the row. Draw an extra loop through the front loop of the top chain between 2 stitches.
Complete 4 [7, 10] increase rows
Place a stitch marker at the end of the final increase row (for attaching the strap later).
Work the next row as normal afghan stitch, no increase
Continue with 7 [10, 13] rows of normal afghan stitch
Start decreasing at the end of the next row. Decrease by crocheting the 2 next to last stitches of the row together, then work the last stitch normally.
Place a stitch marker at the end of the first decrease row.
Complete 6 [9, 12] decrease rows
Bind off.
STRAPS
You will need 4 straps and 1 back lace. Create these using a simple chain stitch on your 5mm standard hook.
Make 4 separate chain strands 25 [30, 35] chains long.
Make a back lace 100 [120, 150] chains long.
CONSTRUCTION & FINISHING
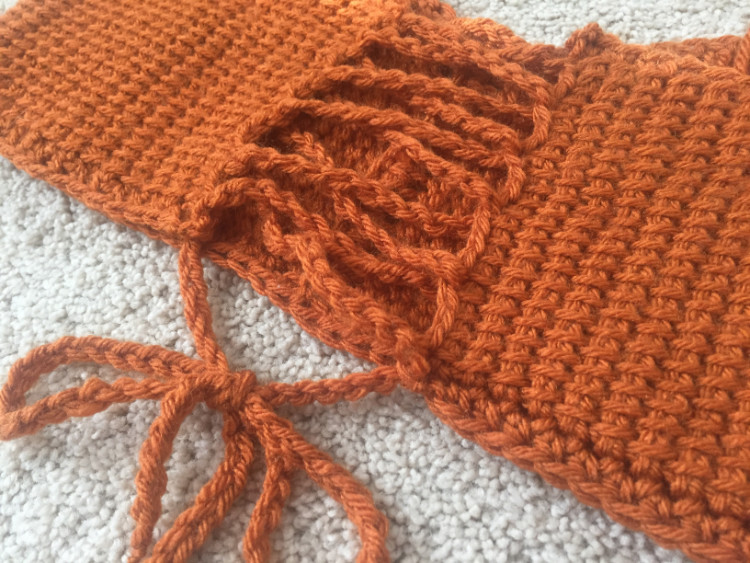
The last row of both the top pieces looks looser than the beginning row. You are going to use that loose look to create a mesh-looking seam down the front of the top.
Match the pieces up right sides facing each other. Use your 5mm standard hook to single crochet the 2 pieces together. Use the wide holes from the loose rows as stitch spaces.
Add decorative edges to even everything out. Using your 5mm standard hook, single crochet evenly across the entire top edge of the bralette.
Likewise, half double crochet evenly across the entire bottom edge of the bralette.
Attach your straps to the front pieces of the top by tying them to the edge where you placed stitch markers (at the end of your increase rows and the beginning of your decrease rows.)
Make sure they aren’t twisted and tie them together at the other ends.
Attach the now joined end to the back of the top. I suggest trying to center them on the back panels, however this is more a question of comfort, so feel free to move them wherever they are most comfortable for you 🙂
Lace the back edges together, starting at the top corners of the 2 halves.
Lace evenly all the way down the seams, approx. every 4-5 stitches.
Weave in any ends.
There you have it! This top is very versatile so you can easily add as much flair and personality as you’d like. If you have any issues working with the pattern, please leave a comment below and I will try my best to help out!
Happy Hooking!
